A Quick Guide to The Webley MK1

Paul Angel • February 2, 2026

A Quick Guide To The Webley MK1.

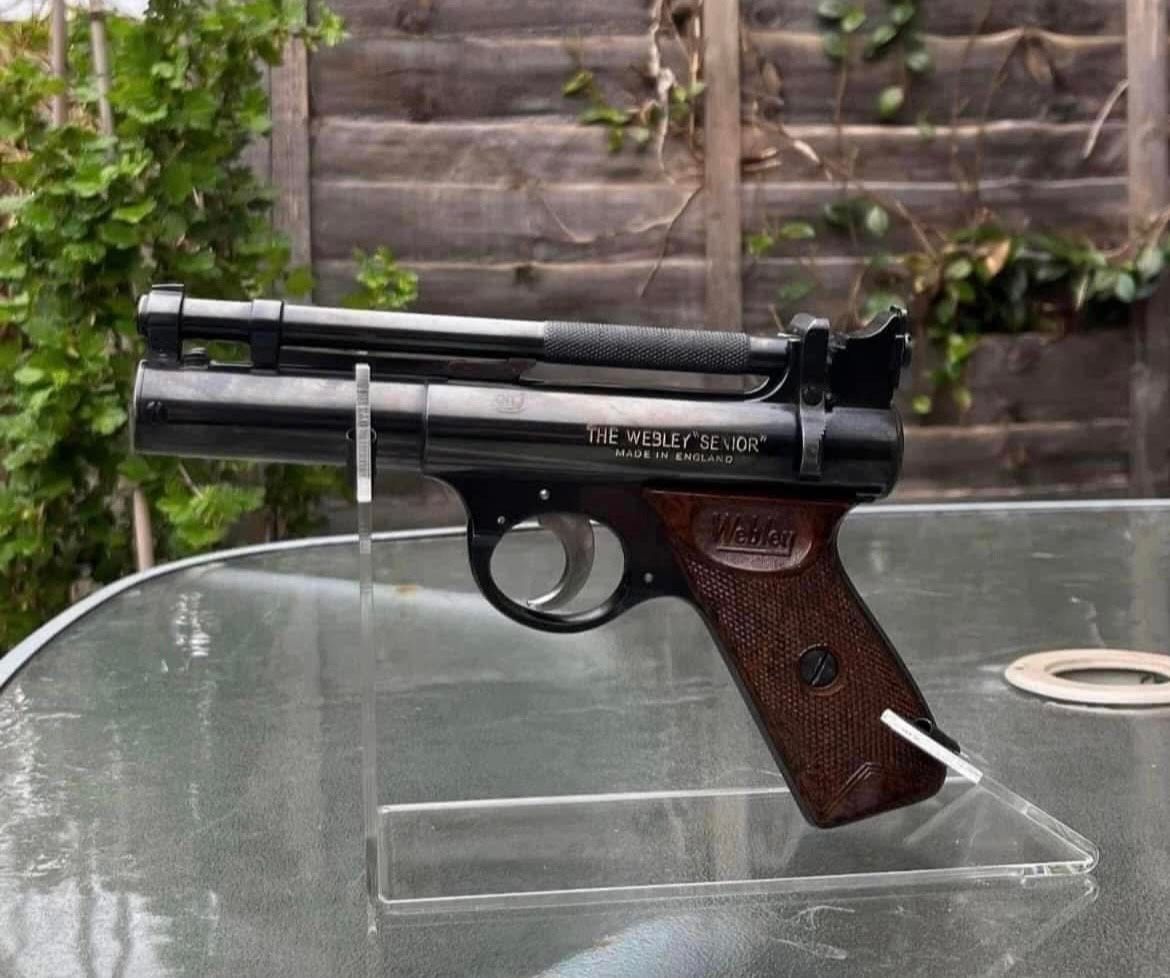
Webley MK1 Air Pistol Identification Guide (1924–1964).


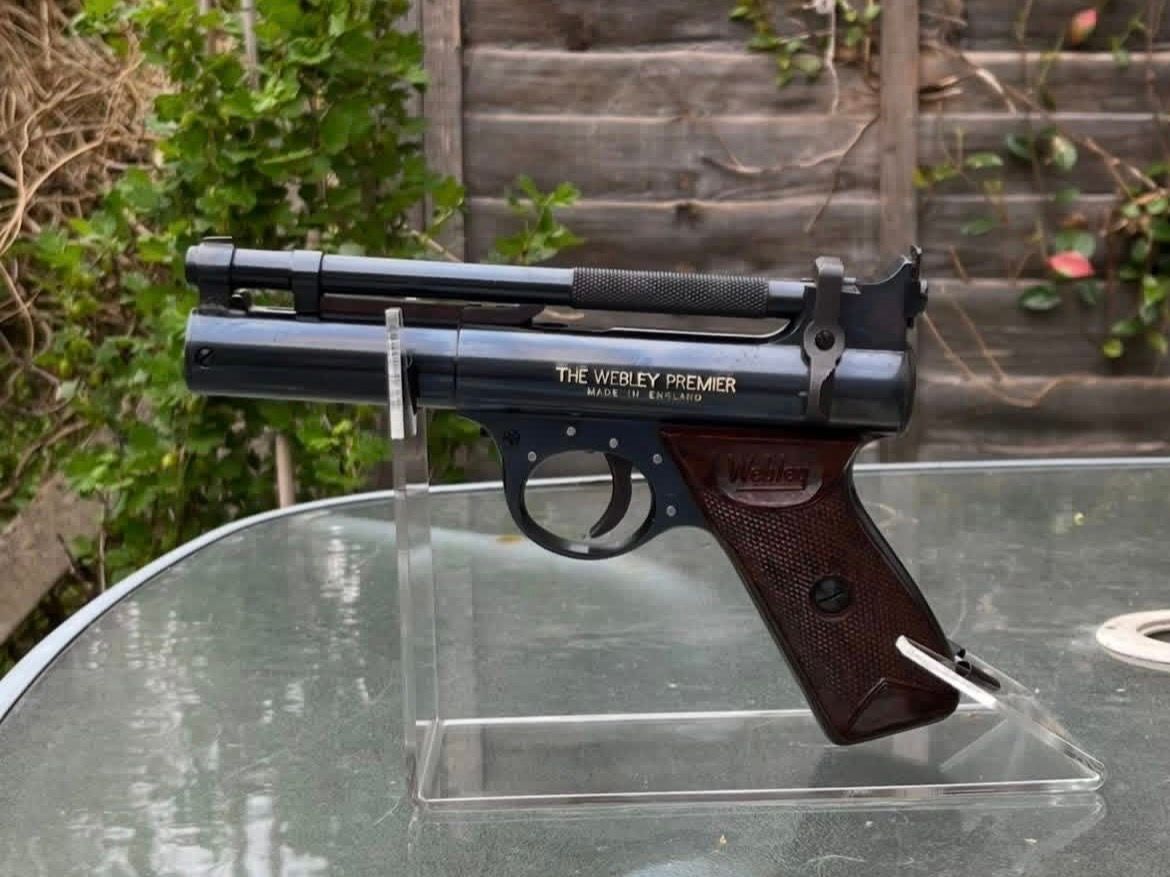
The Webley MK1 air pistol is one of the most iconic British air pistols ever produced. Manufactured from 1924 to 1964, the MK1 remained entirely solid steel throughout its production, never transitioning to alloy construction like later Webley models.


This guide provides a quick reference for identifying the main variations of the Webley MK1, focusing on grip styles, barrel changes, trigger adjustments, and production-era features to help collectors and owners accurately identify their pistol.


Serial Numbers and Dating the Webley MK1

As with all Webley air pistols: Pre–World War II MK1 pistols were serial-numbered, Post–World War II MK1 pistols were batch-numbered, For detailed dating information, please refer to my previous article:  “A First Guide to Webley Air Pistol Dating.”


Straight-Grip Webley MK1 (1924–1935)

From 1924 to 1935, the Webley MK1 featured what is known as a straight grip. Most straight-grip MK1s used walnut grips, typically fitted with a brass Webley medallion on the left-hand grip.


Key Design Changes During Production

The straight-grip MK1 saw relatively few changes over its production life, the most significant being: The addition of a trigger adjustment screw, Changes to the barrel top catch design.


Trigger Adjustment by Series

Series One and Two:  No trigger adjustment, Series Three, Four, and Five Trigger adjustment added, featuring two different cone-head designs.


Barrel Overhang and Piston Access (Straight Grip)

Most straight-grip MK1 pistols had: An overhanging barrel, Rear-only piston access. Sometime prior to serial number 36964, piston access became available from both ends of the cylinder, as documented by Gordon Bruce in reference to the Sixth Series.


Sloped-Grip Webley MK1 (1935–1964)

From 1935 onwards, the MK1 adopted a sloped-grip design and transitioned to Bakelite grips. Bakelite Grip Identification, Pre-war Bakelite grips no Webley logo, Post-war Bakelite grips, Webley logo embossed on both grips. Piston Access Changes, access to the piston was now via the front of the cylinder which required removal of the barrel and spring guide.


Barrel Design and Knurling Changes

1935 onwards: Barrels no longer overhung the cylinder and were cut flush with its end, reportedly for aesthetic reasons. Pre-1939:  Smooth outer barrel, 1939–1945:  Diamond knurling added for improved grip

1945–1964:  Straight knurling used until the end of production.


Important Notes on Dating and Replacement Parts

Collectors are advised not to date a Webley MK1 by removable components such as: Barrels, Grips and any

other easily interchangeable parts. Due to transitional models and widespread owner replacement, this is particularly important for the MK1, which was Webley’s most-produced air pistol.


Final Identification Tips for Collectors

While additional identifiers exist—such as patent markings and factory stamps etc—this guide focuses on the primary model changes most useful to: New Webley collectors and owners seeking to identify an inherited or recently acquired MK1.


Need Help Identifying a Webley MK1?

If you have questions about a specific Webley MK1 air pistol or need clarification on any features, feel free to get in touch. I will endeavour to assist wherever possible.
By Paul Angel July 24, 2026
Parts Due in or yet to be assessed or checked.
By Paul Angel July 21, 2026
Cold bluing is a simple and cost-effective way to restore the appearance of worn steel parts on air rifles and air pistols. While it will not be as durable as a professional hot-blued finish, it can produce excellent results when applied carefully and patiently.  Items You'll Need Cold bluing solution or gel. Degreaser (acetone works well). Fine wire wool (0000 grade). Clean cloths or paper towels. Nitrile gloves. Rust and blue remover (optional). Air gun or gun oil. Fine abrasive paper (240–1200 grit). Step 1 – Prepare the Metal Remove the existing finish using fine abrasive paper. If the metal has scratches or heavy corrosion, start with around 240-grit paper and gradually work up through finer grades, finishing with 600 to 1200 grit. Sand lengthways along the metal wherever possible. This produces a smoother, more traditional finish and helps avoid visible sanding marks. Ensure all rust, pitting residue, and old bluing have been removed before moving on. Step 2 – Degrease Thoroughly Using acetone and clean paper towels, wipe the bare metal until no dirt, oil, or dark residue remains. Any grease left on the surface can prevent the bluing solution from working properly. Step 3 – Warm the Metal Gently warm the metal using an oven, heat gun, or hair dryer until it feels hot to the touch but not excessively hot. Warming the metal helps the bluing solution react more evenly and can improve the final finish. Step 4 – Final Clean Give the warmed metal one final wipe with acetone to remove any fingerprints, dust, or contamination that may have appeared during handling. Step 5 – Apply the Bluing Solution Pour a small amount of cold bluing solution into a separate clean container. Never dip applicators directly into the original bottle, as contamination can reduce the effectiveness of the product. Using a cotton swab, cotton pad, or clean applicator, apply an even coat over the metal surface. Step 6 – Allow the Reaction to Work Leave the solution on the metal for the time recommended by the manufacturer, typically between one and three minutes. A grey or dark residue may appear on the surface. Once the reaction is complete, gently rub the metal with 0000-grade wire wool to smooth the finish. For a deeper colour, several light applications are usually better than one heavy application. Step 7 – Neutralise and Dry Rinse the metal thoroughly with cold water to stop the chemical reaction. Dry the surface completely using clean paper towels or a lint-free cloth. Once dry, lightly buff the metal with 0000-grade wire wool to remove any haze or uneven residue. Step 8 – Oil the Finish When you are satisfied with the colour and appearance, generously coat the metal with air gun or gun oil. Allow the oil to soak into the newly blued surface overnight. The following day, wipe away any excess oil with a clean cloth. This final step helps protect the finish and improves its durability. Safety Notes Cold bluing products contain chemicals that can be harmful if used incorrectly. Always work outdoors or in a well-ventilated area. Wear nitrile gloves and safety goggles at all times. Avoid skin and eye contact with the solution. Keep products away from children and pets. Protect work surfaces from spills by using a disposable, non-absorbent covering. Always follow the manufacturer's instructions supplied with your chosen bluing product. Final Thoughts Cold bluing is an excellent skill for collectors, restorers, and enthusiasts who want to improve the appearance of vintage air guns. The key to success is preparation. Taking extra time to remove rust, polish the metal, and thoroughly degrease the surface will usually have a greater impact on the final result than the bluing solution itself. Remember, patience produces the best finish.
By Paul Angel July 10, 2026
A Beginner's Guide to Renovating Wooden Air Rifle and Air Pistol Stocks.
By Paul Angel July 7, 2026
5 Common Problems Found in Vintage Spring-Powered Air Rifles and Pistols
By Paul Angel July 3, 2026
Air Gun Dating and Claims. 
By Paul Angel January 15, 2026
Webley Hurricane Dating and Series Differences.
By Paul Angel January 14, 2026
Webley Air Pistol Dating.